Factors Which Affect Automated Dialogue Replacement (ADR)
Many people who are new to the film industry are unaware of what ADR actually means. Well, the answer is really simple: ADR is the abbreviation for Automated Dialogue Replacement. It usually comes towards the end of the post-production process. Now, why would anyone need ADR? Well, the main purpose of ADR is to improve the overall film by removing bad soundtracks or disturbances in the movie or perhaps just translate the movie in another language.
Many people may refer to ADR as dubbing but this is a misconception. Dubbing is when the TV series or film has voiceover without changing the footage or dialog. However, with ADR, a director guides the process with an ADR supervisor to look and improve the footage by using voice actors and the ADR writers rewrite the script accordingly. Since ADR isn’t an easy task, it becomes imperative for you to be aware of a few factors and how to improve them:
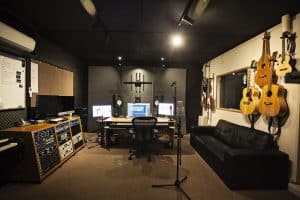
Recording Space
When it comes to ADR, you have a lot more control over the audio of your film than when it is originally recorded. The overall goal of post-production is to obtain a neat and clear ADR recording so that you can later add it in the actual film to remove any discrepancies. Therefore, the recording space of the ADR is of great significance. Make sure you are in an acoustically treated environment, because if you are not, you may notice a lot of problems during post-production. The best way to avoid these problems is to deaden echo sounds as much as possible and eliminate all ambient noise from the recording space.
Equipment
Of course, without proper equipment, it can almost seem impossible to get a clear audio recording. Please note that in ADR you have to use the same microphone which was used during the production. This is because the main goal of automated dialogue replacement is to persuasively match the original dialogue of the film. Without the same microphone, you may notice slight differences in tonal characteristics and frequency responses. DAW (Digital Audio Workstations) such as Cubase, Nuendo, Adobe Audition, Logic Pro, Abelton Live, and Avid Pro Tools will satisfy all your ADR recording needs.
Ambient Reverb and Tone
Once you have obtained a clear ADR recording, you can now begin adding the dialogue to the actual movie. However, before you begin, you must ensure all ADR dialogue is in sync. You can use VocAlign Pro which is a powerful plug-in that ensures proper syncing. Another option is manually editing the ADR, but since it is time-intensive and complicated, you may not understand how to match the ambient tone and reverb. Now, the next challenge is to match the EQ and reverb according to the recording which was done on location. For this, you can use a convolution reverb which is a plug-in that simulates a real acoustic space.
So, now that you are familiar with the factors mentioned above, improving the overall ADR recording won’t be a problem.


