How to Make Audio Cables for a Recording Studio!
In this article we’re going to talk about why our recording studio, Crash Symphony Productions, make our own audio cables and how to make them. Let’s start by briefly looking at why it is more cost effective to make your own recording studio audio cables than to purchase them pre-made.
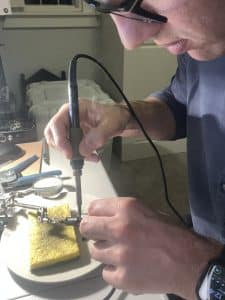
James Englund making an audio cable for his recording studio, Crash Symphony.
Audio Cable Costs, Quality, and Length.
Making audio cables for a recording studio is vastly more cost effective. Purchasing pre-made audio cables is extremely expensive. Recording studios need a lot of audio cables. In order to purchase the right number of audio cables, and at the exact required length, the studio owner would need to do a lot of online searching. Almost every studio owner ends up making their own cables because the cost of quality cables is very high. The lengths for each run is so specific that it can be almost impossible to find the right cable. By purchasing the best cable and connectors in bulk, you’ll keep the cost down and be able to cut the perfect length for your studio every time you need a new cable. Read on to learn how to make audio cables for your recording studio!
How to Make Audio Cables for a Recording Studio!
The first thing that you’ll need to do is purchase the parts and the equipment to make your audio cables. There are two brands that we highly recommend for recording studio audio cables: Mogami and Canare. They’re both Japanese made audio cable. We go for the quad core versions of these cables. This means that there are four lines within the cable as well as the shielding, or grounding.
Every audio cable that is balanced (we’ll focus here on balanced cable) has three pins. Pin 1 is for the ground and Pin 2 is referred to as the hot pin. It is important to know that Pin 3 is the neutral Pin whereas Pin 2 and 3 have the “cores”, or lines, connected to them. Pin 2 is white and Pin 3 is another colour, most often blue. Each of these two pins, in quad core cable, has two lines. So, there will be two white cables and two blue cables. The whites need to be twist around each other and so do the blue cables. Why?
Twisting of the Inner conductors
Twisting the audio cables cancels out the RF, or Radio Frequencies. It makes the cable’s SNR (Signal to Noise Ratio) much lower. The cable is quieter. We like that when we’re making audio cables for a recording studio. Less noise is better! There is a lattice of wiring that surrounds the outside of these four inner cores. This is the shielding, or grounding cable. You’ll need to purchase a sharp pin, we call it “a picker”, and use it to unpick the lattice. Once this lattice is unpicked it will be rolled into a single wire and treated as the grounding cable. This grounding cable will serve to drain any excess static away from the cable, act as a faraday’s cage to the inner cores, thus, protecting them further from surrounding radio frequency.
Furthermore, it will keep the potential across the audio cable balanced. Overall, without getting too deeply into the electrical engineering, this will keep the cable more quiet and the music will sound better. Without it the audio signal through your cables will be very noisy and most likely unusable.
Stripping Off the Outer Cover of the Audio Cable
Take a good pair of clippers that are sharp. These will be one of your most valuable tools when making cables. take it to the cable as if you were going to cut the whole cable BUT DON’T CUT THE CABLE. Slowly compress until you feel the blade has cut down to just before the interior lattice. Once that is done swivel the cable around until it cuts the circumference of the outer plastic cover. Now you should be able to pull off the outer cover without destroying the interior lattice. We need to lattice intact because that is our grounding cable and shielding.
Preparing the Inner Conductors
You’ll need to prepare the tips of each of the inner core conductor cables before twisting them together. There’s a tool called a cable stripper that is perfect for the job of cutting off the end of each cable. this will expose the inner copper. Roll the copper together with your fingers when you’re making audio cables for your recording studio. This will ensure that the copper doesn’t fray and become hard to work with. Once each core conductor end is neat twist the copper pair together. Tin the ends of each of the twisted cores.
“Tinning” is where we add a bit of solder to each end to fix the copper together as one tip. Now you’ll have two ends of each twist pair. A white twisted pair and a blue twisted pair. You’ll also have a neat grounding line. Three points to solder to the connector. You’ll need to cut away any inner paper and string line that also occupies the interior of the audio cable. The paper and string is there to add matter to the core and strengthen the cable overall.
The Soldering Iron and Soldering Tip
It goes without saying that you’ll need to get a good soldering iron. We recommend the Hakko products for making audio cables for a recording studio. It’s also a great idea to purchase a chisel head tip for your soldering iron. These geometric tips lend themselves perfectly to making audio cables for a recording studio. Sharp tips are too hard to work with. Also, set the soldering temperature to 450 celsius. This is a good temperature for getting the solder to melt quickly but not so fast that it’s hard to work with on the cable.
There’s a lot of different solder out there. We recommend the most basic solder that is solder from stores like Jaycar. A good diameter to work with is 0.7mm as it’s not too thin. They also come in convenient tubes rather than on a reel. It’s a lot easier to hold and work with than needing to cut off a line of solder each time.
TRS, XLR, and Preparing Both Ends of the Audio Cable
You’ll need to prepare both ends of the cable before you begin to add the connectors to the cable. The preparation of the audio cable, outlined above, is the most time consuming part of the whole process. There are two kinds of audio connectors that are most common in recording studios. TRS connectors and XLR connectors. TRS stands for Tip, Ring, and Sleeve. These look like standard quarter inch guitar leads except they have an extra ring. The tip is Pin 2. The Ring (the centre piece of the connector) is Pin 3, and the base ring is the ground pin, Pin 1. When looking at the back of the connect, Pin 2 is the centre connecting point, Pin 3 is the top connecting point, and the larger surface is where Pin 1, or the ground, is connected.
Adding the Connectors to the Audio Cables
Adding the connectors comes last. It’s the easiest part of the whole process. There is one big catch. Make sure you put on the boot (or base) of the connector on before soldering anything. It’s super easy to solder on the pins only to realise that you’ve forgotten to put on the base and can’t screw it all together. Make sure the booths of each connect is added before doing any soldering. This goes for both TRS and XLR connectors.
TRS Vs. XLR
TRS and XLR connectors are just different kinds of connectors that essentially do the same thing. One big difference is that TRS cables will look the same on both sides whereas a typical XLR connector will have a different physical structure (connector) on each end. Of course, it’s common to have mixed cables too. For example, a TRS-to-XLR. XLR’s have male ends and Female ends. The male ends have the pins coming out and the females have the holes. One common error in soldering XLR cables is to solder them the same on both the female and male cables. This is wrong. Only the central pin, Pin 3, will be the same. The other two will be swapped around on an XLR-to-XLR cable. They will be mirror images of each other. This is a really important thing to remember when solder purely XLR cables.
A Small Stand with Clamps will Help you Make Audio Cables for your Recording Studio
We also recommend a small stand with some clamps to aid in holding connectors and wires when performing any soldering operations. These can be commonly purchased from electronic stores like Jaycar and are invaluable for making your own audio cables in a recording studio. A big stand mounted magnifying light is also amazing in aiding in making these cables. The more visual magnification and light the better.
Heat shrink can be very useful in creating electrical isolation between the connectors. We usually cut off about half a centimetre and lay it over each twisted pair before soldering. Once the solder point is complete it’s useful to pull it over the solder connection, add heat via the soldering iron, then the heat shrink will literally shrink over the connection ensuring that the connection point is completely physically shielded from any other electrical contact. It’s not completely necessary but certainly takes the cable quality to the next level.
Add the Connectors to the Audio Cable
Once the solder points are complete it’s time to add the plastic shield over the top of the cable solder points. This keeps all the interior work completely physically guarded against the metal of the connector and anything else that might want to get near the connection points. Once that shield is over the top you can slide up the boots of each connector. We like to replace the XLR connector rings with coloured rings. This will allow immediate identification for bother ends of the XLR cable. Red to red, or blue to blue. If all the cables are identical it makes it super hard to figure which cable is which and that’s something that you don’t necessarily want to do in a stressful recording studio session.
Neutrik Connectors for Audio Cables in Your Recording Studio
Our cable connector of choice is the Neutrik connectors. We always go for the top-of-the-line connectors which are black and gold. We find that our our solder fuses to these high quality connectors much better than the silver and black connectors. When the solder fuses to the gold connectors immediately it is a much more solid fusing and the experience is more enjoyable. The cable quality is much higher with the gold and black connectors.
Cable Testing when making audio cables for your recording studio
Once you’ve completed the cable there’s one last important thing to do! Test the cable to make sure it’s functioning as you would like. The best way to do this is to get a cable tester. There are some great cable testers out there. This will tell you if there’s continuity and that the pins are soldered up correctly. On our tester, the Orange and green lights need to line up. If they don’t line up you’ll know immediately that there’s an error in the pins. If there’s no light then there’s no continuity. Continuity is the electrical term for a good electrical connection.
There you have it! High quality audio cables for your recording studio! They’ll be the exact length that you need and much higher quality that can be purchased online. Initially it can be a little intimidating learning how to make your own audio cables but once you know, you know! You’ll be able to make any length to your hearts content, keep your costs down, and rest easy knowing that your audio cables will be the best available.
Happy soldering!
For more information about our recording studio contact Crash Symphony Productions on +61 408 300 402 or email us at info@crashsymphony.com.au.