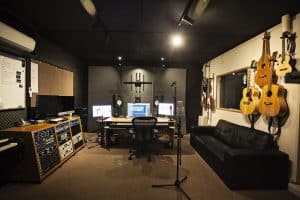
Sydney Recording Studio Job Brief
The Sydney Recording Studio, Crash Symphony Productions, recently accepted the job to record a wedding music company, Musical Functions, outside the Sydney Opera House. The brief was that the wedding band would be set up outside on Bennelong Lawn (right in front of the Opera House steps), would be filmed by multiple cameras (including a flying drone), and needed to be recorded at high quality. Once the audio was captured, it would be mixed back in the Sydney recording studio and then it would be sent to the video editors for sync-up.
Recording Challenges
Straight away, anyone could see that this was going to be an interesting, but challenging, job. The first issue was to figure out how we could capture the performance of the band at high quality, without all the ambient noises of city life ruining the recording. Secondly, we needed to figure out a way to record the band without microphones and audio cables/gear being visible everywhere and ruining the camera shots. Finally, the company wanted to record a large number of songs (and different singers) in a very short space of time.
The Solution to Creating a Sydney Recording Studio Outside
We decided that we didn’t want to have a large number of microphones being used. This would have definitely increased the ambient noises spilling on to the recordings, and it would not look great on camera. In our Sydney Recording Studio we can get away with using lots of microphones on a drum kit- we don’t really care what it looks like, so long as it sounds great and achieves the audio results we need. What it sounds like is always the first priority.
So, instead, we chose to use only overhead microphones on the drum kit, and the snare, kick and floor tom (only a floor tom on this kit) was triggered. These triggers would detect hits on the drum skins and then send MIDI signals to our drum brain, which was a Roland TD-3. This then triggered the sounds in our Logic Pro X DAW using samples from the program BFD 3. We were able to sample in a great sounding kick, snare and tom.
The overhead microphones were a pair of AKG 414s, which were running through API 3124 preamps. The microphones also had their custom-built wind block on and were placed equidistant from the centre of the snare drum. One was just over the drummer’s hi-hat-side shoulder and pointing down at the snare. The other was situated low over the floor tom and was pointing almost horizontally across to the snare drum. The microphones were situated close to the kit so that the signal-to-ambient noise ratio was very much in favour of the drums.
Straight away the sound of the kit was great, but there were a few technical hurdles that we needed to overcome before it would work seamlessly. The floor tom trigger was working great from the get go, but we noticed that every time the snare drum was hit it would also trigger the kick drum trigger. So there would be a kick/snare simultaneous hit when it wasn’t intended. We solved this by relocating the kick trigger on the front side of the kick. This was considerably unconventional, but it worked. The kick was being played with enough power that it was triggered when hit, but it was no longer being triggered by the snare hits.
Once the drum kit was sounding good enough for the purposes of tracking, it was time to integrate the guitar and bass. We started with the bass because the bass and drums would be static in player and instrument over the two days that we would be recording. We chose to plug bass and the guitar straight into the preamp line-in, then used sounds from the program Guitar Rig for the bass amp and the guitar amp. By using these plug-ins, we were able to eliminate the need for microphones on the amps. In fact, we didn’t need to use an amp at all! This made the camera shots look even better, and the sounds were much easier to control- not to mention extremely clean.
For the vocal(s) microphone, we elected to use the Shure Sm7b. This is great microphone for tracking vocals because it has a low mechanical handling noise, it has a punchy mid sound that cuts through mixes well, it has a wind guard, and is highly directional. Overall, these microphones were able to reduce environment noise from detrimentally intruding on our recordings.
The other instruments that also needed to be recorded were the violin and keyboard, as well as a tenor saxophone on one song. I realised that the system that we were using for the recordings were limited to 8 audio tracks- but, luckily, this was pretty much just enough for what we wanted to do over the two days of recording.
The keys were tracked using MIDI just like the kick, snare and floor tom. If we had used audio for the keys it would’ve taken up 2 of our 8-track limit for the left and right mono signals of the keyboard. Using MIDI allowed us to change the instrument patches after the recordings were made and change notes using the MIDI interface in Logic. It was a much more flexible approach for the purposes of this project.
The problem that we ran into, in our attempt to capture MIDI from the drums and keys, was that we couldn’t figure out how to separate the two MIDI signals into a keys channel and a drums channel. In the end, we decided not to waste time trying to work out how to do that in the new Logic Pro X- we would separate the MIDI out manually in the studio after it was all recorded.
This definitely made life trickier on the day of recording. The piano player couldn’t hear herself when the MIDI channel was switched off. Thankfully, we didn’t need the band to hear any drums in the fold back wedge, because they were already so loud. This meant that we only needed to send the keys to the wedge. Still, the drums were triggering some funny notes on the keys too. The band members understood and we managed to push on and not let this slow us down too much- there were many songs to record in a such a short period of time!!!
The violin was very easy to record. The violinist (who was also the owner of the wedding business) had a pick up on his violin and that was going into a DI that he had brought to the recording day. Unfortunately, this was very much the worst signal of everything that we recorded over the two days. The signal was extremely muted and there were sporadic crackles and pops from faulty audio lines or wiring. It was later decided that we would record that violin again and separately in our Sydney Recording Studio. This wasn’t necessary but it was the violinist’s company and it made sense that he would want it to sound fantastic, rather than ordinary. We chose to record the violin going straight into the preamp on the day, to avoid using a microphone that would introduce ambient environment noise on the recordings.
The final instrument to record was the tenor saxophone. This was the only instrument that was not recorded as part of the whole band. The sax player couldn’t make the earlier session times so as part of the final takes on the second day we ran the song that he was to track to through the fold back wedge and he recorded with the band that way. We’ve never seen this done before but it ended up sounding fantastic. The tenor saxophone needed to be recorded with a microphone and we used the vocal microphone to capture the sound. The Shure sm7b ended up sounding great on the tenor, which was not surprising considering the similarity in tone between the tenor saxophone and the human voice.
Reflecting on the Two Days of Outdoor Recording
One thing that added to the smooth running of the recording sessions on those two days was making sure that we had set up our system in the Sydney Recording Studio the day before the first outdoor session. This meant making sure that all the microphones were getting signals, knowing exactly which cables were going where, and that the project was set up and ready to go in Logic Pro X. The only thing that we missed was the two MIDI signals not being separable.
Also, when we packed up the set-up in the Sydney Recording Studio the day prior, we separated all the cables into MIDI, audio and computer/power. This way, when it came to setting up at 6am on a freezing cold Sydney winter morning, everything was really easy. Step one was to place out all the hardware and microphones. Step two was to cable up the computer and power. Step three was to run out all the audio cables. Step four was to run out all the MIDI cables and system. Setup time was about 45 minutes. We were able to pull a good sound for tracking in about 15 minutes and we were off. We ended up recording about 18 songs over those two days of recording and about 8 different singers.
More to come on our Outdoor Sydney Recording Studio!
The next article is how we made those recordings come alive in the Sydney recording studio and how we were blown away by how good it sounded. It was an amazing recording to come from an outdoor Sydney Recording Studio!